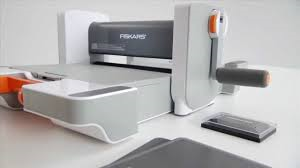
The Fiskars Fuse
- Details
- Created: Tuesday, 02 September 2014 16:51
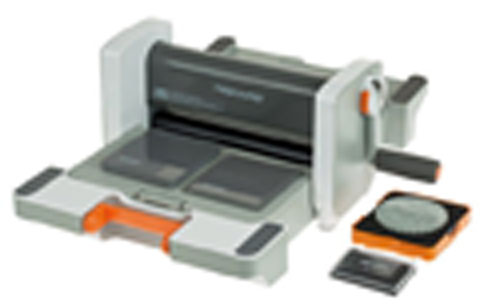
I purchased this wonderful machine from HSN on one of their specials. I didn't take the stagered payments or whatever they call making payments for months on your credit card, I just bought the thing. I wanted something that would cut any size die, and this will cut anything up to 12" x 12" which in anyone's book is a good sized die. I also purchased some of the dies they had on special to go with this wonderful contraption.
The dies work just as they are advertised. You put the die in the orange cover and put an embossing plastic on top, you ink the embossing plastic part without getting the ink on the die or the felt around the outside of the die. To do this I have found that it is much to the inkers advantage if you cut the die out of scrap paper that is big enough to cover the outside of the die and then lay that piece of paper on top of the die and then ink the embossing plastic part. This way you do not get any ink on the felt around the die, it is much less messy. The cutting mats that come with the fuse are just plain weird. The top is a funny material that the die actually cuts into, coming from the hard acrylics plates of the sizzix machine this confuses me and seems so strange. They work don't get me wrong they just seem strange.
I use my sizzix plates and platforms in the fuse, they work just fine for me. I have the magnetic platform and it works wonderfully in the fuse. For the thinner dies and the embossing folders I just use the regular platforms, using the magnetic platform to cut the thinner dies using both top and bottom acrylic cutting mats. I also use the regular large steel dies with the top and bottom acrylic plates and they work just fine.
I purchased the adapter kit with the fuse and really don't use it but it sets next to the Fuse just in case I might need it. I think I used one of the skinny litte pieces of plastic with my sizzix platform trying to get a good cut from one of the spellbinder dies...one of those with the intricate edges...I never got it to cut correctly. I spent one whole afternoon pulling and pushing the little pieces of paper out of the die until I just gave up and put that die in the to be donated pile.
Now lets talk the overall size of this machine......it is big, really big. Common sense would indicate it would have to be big to cut a 12" by whatever length die but actually finding a place to put it in the craft room is the problem. I have a twin bed in my craftroom/extra bedroom situation and this machine sits on a big cutting board on the twin bed. This works but it would be nice to have it on a work bench of some sort. But unless I can figure out how to twitch my nose and make my house bigger this machine has to stay on the bed. The machine does fold up into a somewhat smaller size but folding it up doesn't make it any less heavy so it still weighs the same, of course. So even folded up to take or carry this machine weighs alot, it weighs so much I can't in good conscious call it a portable machine.
I like this machine and the other machine I had is in the give to my daughter box so she will be happy until she sees this machine and then she will want one of these. I have to admit I did keep the heavy red original sizzix for smashing pop bottle caps though so I must just like heavy machines.